RocketProfit Server
Getting Started
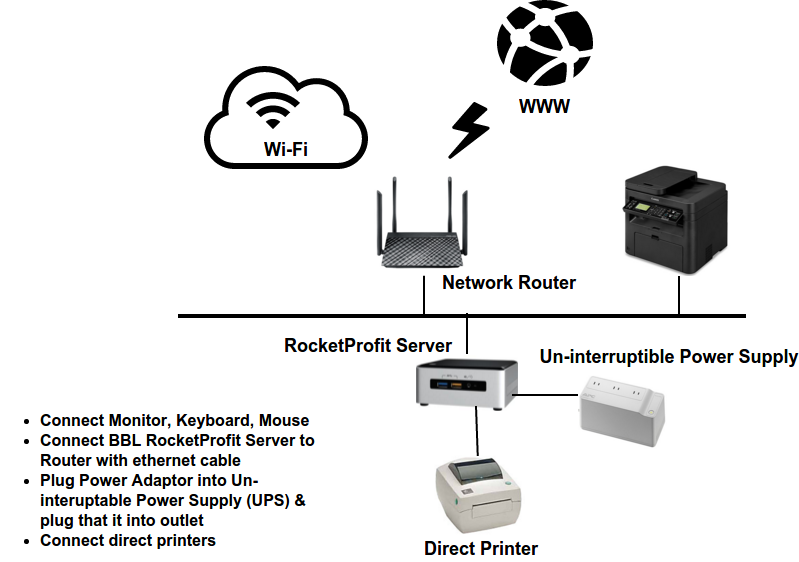
To completely configure the BBL RocketProfit Server (RPS), BBL tech support needs the following information: * Local IP range & subnet * Currently installed printer models & connection type * Available number of router ports * WiFi Status * Router model, ip #, username and password
Once the RPS has arrived, unbox all components and place in out of way location. It must be plugged into your Local Area Network by connecting into a installed router.
Printing
RocketProfit Server sends all ProfitSystem PRINT output to a PDF.
By default, when any PRINT option is selected withinin ProfitSystem, RocketProfit will convert the ProfitSystem output, such as a receipt, to a PDF and copy it to your local device. When processing is completed, a onscreen PDF view button will on a tablet or a PDF view Tab will appear appear on a Desktop device such as PC or Mac using the local tablet/computer's PDF viewer application. Once the Receipt or Report appears it may be printed to a any local printer available from within the PDF viewer's software Print function.
Upon print completion, the user should close the PDF tab/window and return to the ProfitSystem session Tab.
Perform a test print of any webpage or PDF from the tablet/workstation. This test is to determine if a printer is available to tablet/workstation for printing ProfitSystem PDF output. If you cannot print from a webpage/pdf with the workstation/tablet browser, then you cannot print from RocketProfit Server & Profitsystem.
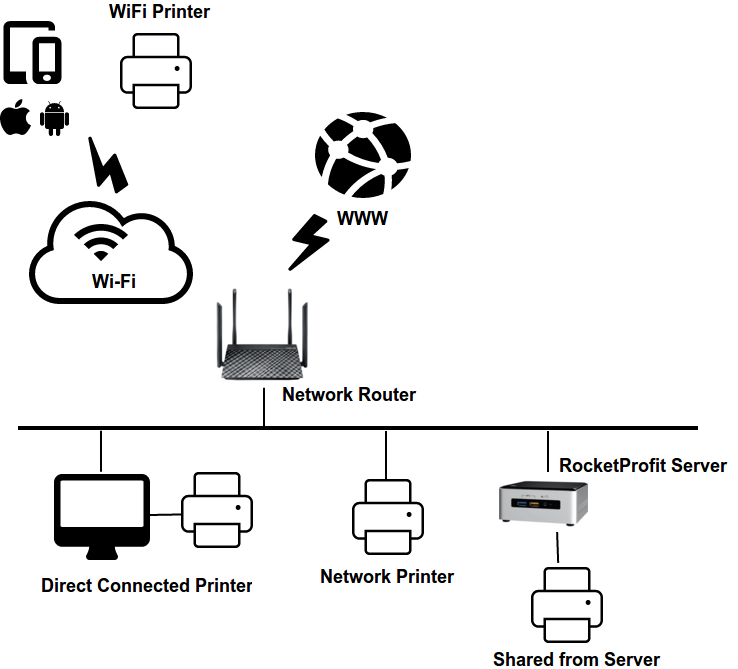
This printing behavior may be modified to bypass the PDF view step when using Networked printers or those directly attached to the BBL RocketProfit Server (see diagram for printer connection options). Printers may be installed by several methods: * Directly connected to a Desktop * WiFi Printer (AirPrint (IOS) or Google Cloud (Android) Print compatible or WiFi direct to BBL RocketProfit Server to allow Tablets to print via RPS) * Networked, connected via cable to switch or router - BBL PREFERRED CONNECTION METHOD
Prior to installing the BBL RocketProfit Server, each Tablet or Desktop workstation should be able to PRINT web-site pages or PDFs to any installed printer. This ability to print is required by ProfitSystem to PRINT customer receipts and other reports from ProfitSystem.
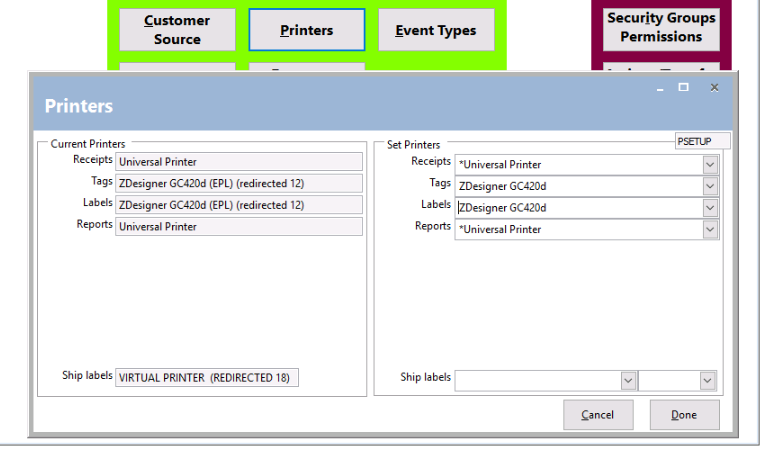
Utilizing the BBL RocketProfilt Server Universal Driver for IOS tablets or Virtual Printer Driver on Androids/MACs/PCs, all printer output in ProfitSystem will display as a PDF print job. Once the PDF displays, then select a printer available to the Tablet or Desktop workstation for actual printing. Printers within the ProfitSystem are assigned on a Workstation/Tablet by Workstation/Tablet basis using the ProfitSystem Printer Form for each.
Printer Set-up within ProfitSystem
Printer Connection option diagram
Compatible Browsers
Chrome, Firefox, Opera / Safari. Chrome is the recommended browser for PCs, MACs and Android tablets. Safari is recommended for iPads.
HTML5 Browser Pull down Menu
Tablet
Desktop
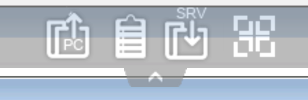
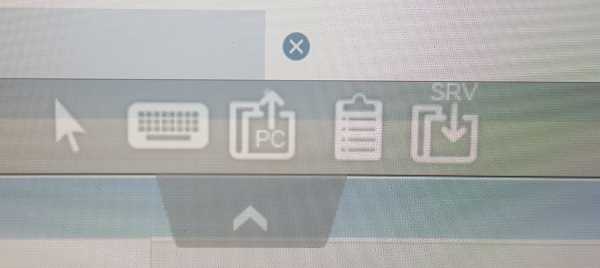
Icons
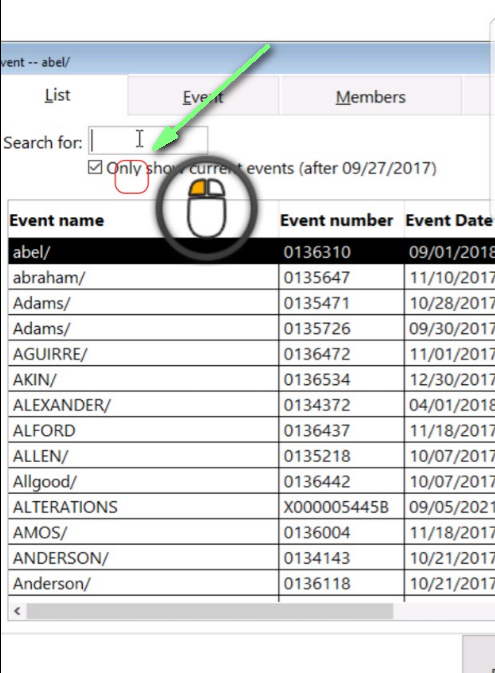
Arrow ... Tablet only. Make Circle Mouse reappear Keyboard ... Tablet only. Toggles Display / Hide for the onscreen keyboard which is used for data entry within the ProfitSystem. On tablets and phones a RED square will appear next to pointer when the cursor is in a data entry field. Touch it to have a keyboard appear.
Clipboard... To copy the text from session to clipboard use Ctrl+C and to insert the text from clipboard use Ctrl+V.
Clipboard... To copy the text from session to clipboard use Ctrl+C and to insert the text from clipboard use Ctrl+V.
But pay attention when you copy the text with Ctrl+C, wait some time before releasing the pushed Ctrl+C buttons, because if the requested clipboard text arrives after you release this key combination, the text will not be added to your environment clipboard. This way uses a native browser clipboard copy support initiated by Ctrl+C.
Alternatively you can use the clipboard menu to copy from and to insert the text into HTML5 session clipboard.
There you can just insert the text into HTML5 session clipboard or add it to clipboard and auto-initiate Ctrl+C on HTML5 session side to insert text. The clipboard menu can be opened via action menu or Shift + F11.
When you copy the clipboard with mouse inside a HTML5 session, the text gets sent to browser and as soon as you go out of browser focus, the clipboard menu appears automatically to inform you that there was a clipboard text and that you did not add it to your clipboard environment.
File Manager / File up ... Use the top menu for file transfer. Unlike real HTML5 the browsers do not allow to access the hard drives directly, the file transfer is emulated. The sub-folder of gateway gets mounted as a WebFile device into your RDP session. Inside the HTML5 session you can access it via Explorer by clicking on 'WebFile' or call '\tsclient\WebFile' directly:
Fullscreen ... Active on desktop workstations only. Function removes Tabs, Address browser, tool bars from top of browser providing moe screen space to application.